Installing A Chain Link Fence
Before purchasing, installing, or upgrading a chain link fence system, it's extremely helpful to understand the components of a chain link fence as well as the step-by-step process of installing a fence system. Below, we've provided a wealth of information to help you understand each part of a chain link fence and walk you through the installation process.
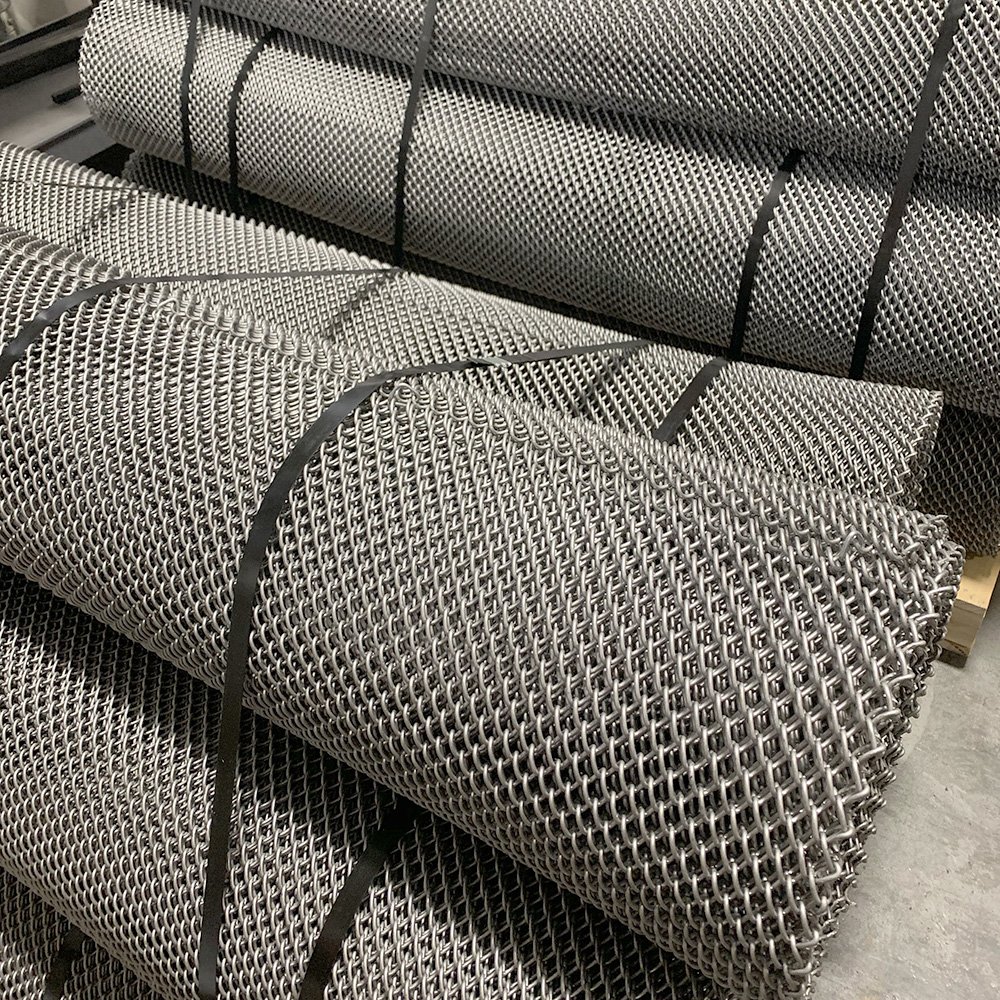
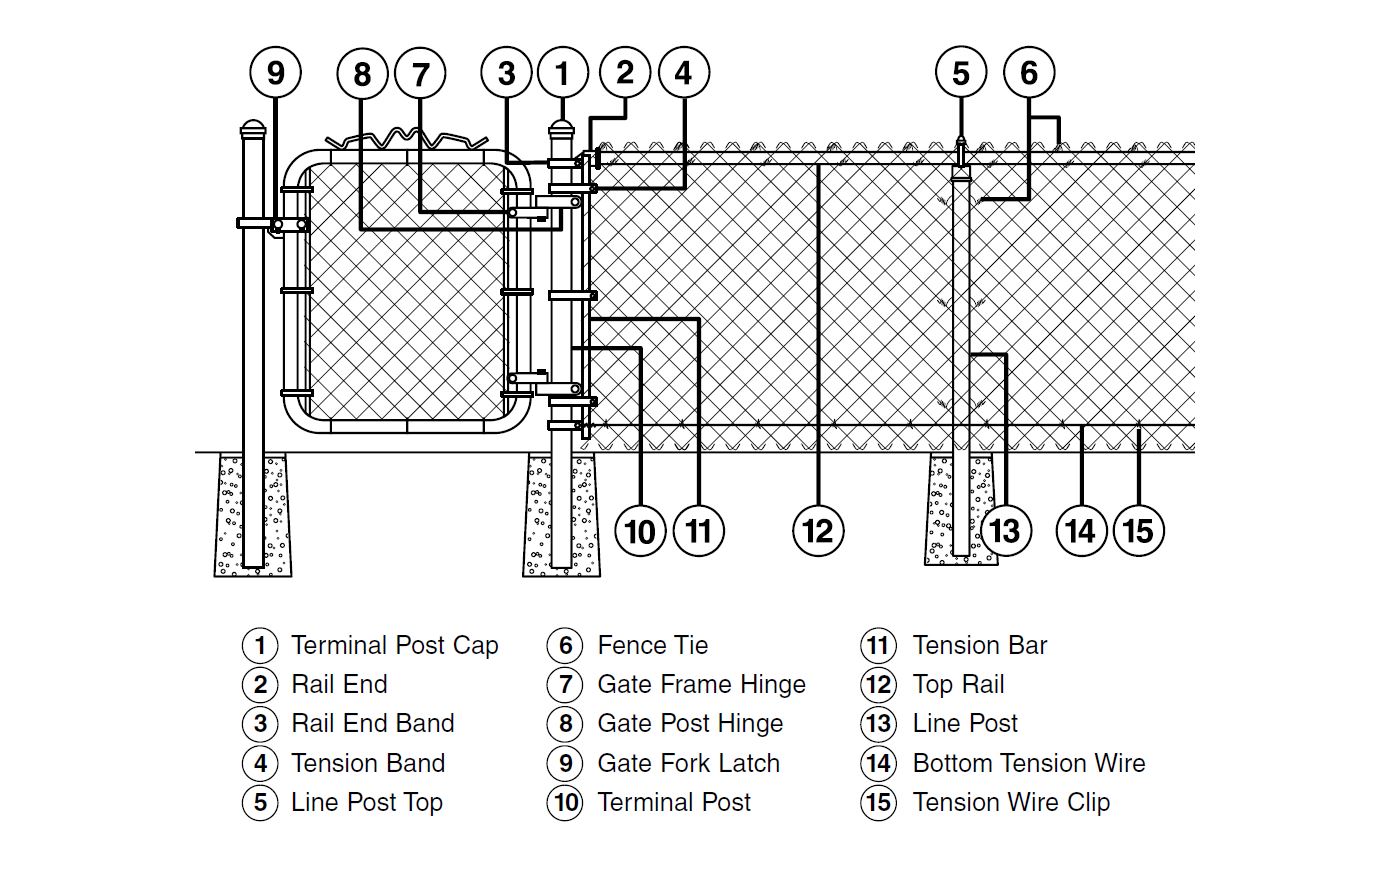
Chain Link Fence Components
Chain Link Fence Installation Preparation
Prior to starting a new chain link fence project, we recommend taking the following steps to ensure that the process goes as smoothly as possible. Make sure that fence footings do not exceed legally established property lines. If you're not sure of the location of your property lines, refer to a real estate agent's line plot or consult a professional surveyor. Review local codes for specifications regarding frontage locations, allowable fence heights, etc. Also, check to see whether a permit may be required. Check with local utility companies for the locations of underground cables or pipelines.
Gather Components To Begin Fence Framework
| Required Tools | Required Materials |
|---|---|
| Hoe And Shovel | Top Rail |
| Pliers | Line Post |
| 1/2" And 9/16" Wrench Or Crescent Wrench | Corner Post/Terminal Post |
| Wheelbarrow | Tension Bars |
| Tape Measure | End Rail Clamps |
| Fence Stretcher | Tension Bands |
| Carpenter's Level | Tension Wire |
| Post Hole Digger | Carriage Bolts And Nuts |
| Hacksaw Or Pipe Cutter | Rail End Cups |
| String Or Chalk Line And Stakes | Post Caps |
| Tension Wire Clip (Hoe Ring) Pliers | Tension Bar |
Fence Layout Guide For Project Reference
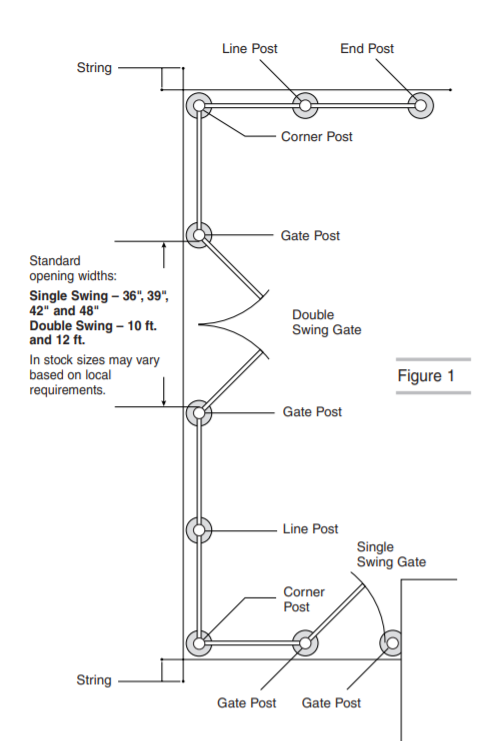
After determining the location of property lines, decide the parameters of your fence, starting at least 4" inside property lines to avoid encroaching on adjacent properties. Drive stakes into the ground to mark the layout for the fence, then run a string around the stakes to mark the fence's path. Measure the string to determine the length of chain link fence fabric you'll need and the parts required.
How To Install A Chain Link Fence
Step 1
Locate your property"s boundary lines. It is recommended that all posts be set approximately 4" inside the property line so that concrete footings do not encroach onto any adjoining property.
Step 2
Measure the overall length of your planned fence to determine how many feet of chainlink fabric and top rail will be required (Fig. 1).
Step 3
Mark the location of each terminal post (corner, end, and gate posts are called terminal posts) with a stake. When determining the positions of gate posts remember that clearance for hinges, latches, and other fittings, are included in the listed opening width of the gate. Therefore, if you ordered a gate for a 36" opening the post spacing should be exactly 36", inside post face to inside post face.
Step 4: Adding Fittings To Terminal Posts
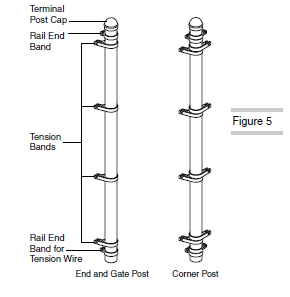
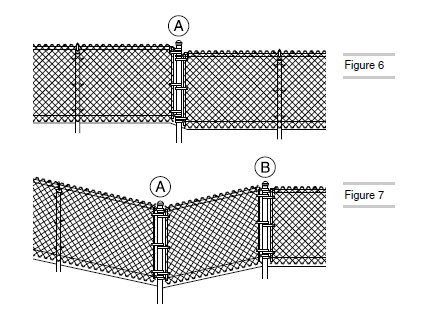
After concrete footings have been allowed to sufficiently harden, slip the rail end bands and tension bands onto the terminal posts. The long, flat surface of the tension band should face outward. Apply all terminal post caps, making sure not to spread or distort the fittings during installation. A corner post assembly is used at a single point to allow the fabric to follow the terraced contour of the ground and at two points when the ground rises or drops more than 15″ per 100 linear feet.
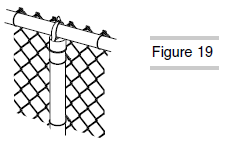
Step 5: Installing Top Rails
Place line post top on the top of each line post. The offset round side should face outward. Insert one length of top rail through the line post top closest to a terminal post. Slip the rail end onto the end of the top rail and attach it to a terminal post by using a rail end band. Secure the rail by using a 5/16" x 1 1/4" carriage bolt with the head to the outside of the fence. Continue by forcing lengths of swedge end top rail together through the line post tops. If a swedge end top rail is not used, join lengths together with top rail sleeves. Upon reaching the next terminal post, measure carefully and cut the top rail to fit tightly between the last length of top rail and the rail end. Fasten the rail end to the rail end band on the terminal post and secure it in place with using a 5/16″ x 1 1/4″ carriage bolt. Top rail fittings can be found here.
Chain Link Mesh And Gate Installation
Step 6: Hanging Fence Fabric
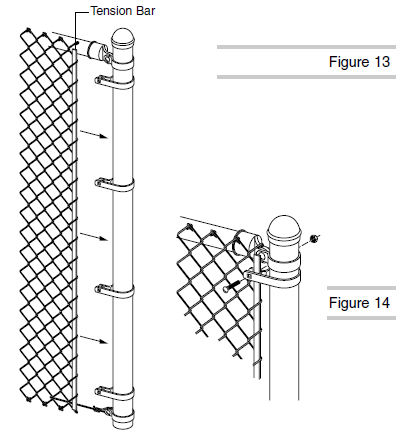
Tension wire can be added to enhance fence stability as an optional step prior to hanging fence fabric. To install tension wire, wrap the wire once around the bottom rail end band using the carriage bolt. Use pliers to twist the wire several more times to secure it, keeping in mind that tension wire should run along the same side of the post as the fence fabric. Apply tension wire clips no more than 24" apart to secure the wire to the fabric. Starting at a terminal post, unroll chain-link fabric on the ground along the outside of the fence line to the next terminal post. Slide a tension bar through the first row of chain-link diamonds. Fasten evenly spaced tension bands (already on the post) to the tension bar and fabric combination using 5/16" x 1-1/4" carriage bolts with bolt heads to the outside of the fence. Walk along the fabric and stand it up against the fence frame, taking out the slack as you go. Loosely attach the fabric to the top rail with a few fence ties to hold it in place and separate enough fabric from the roll to span the opening between the terminal posts. Excess fabric can be removed with pliers by opening the top and bottom loops of a single strand of wire at the desired point of separation, then unwinding the strand up through the links until the fabric comes apart.
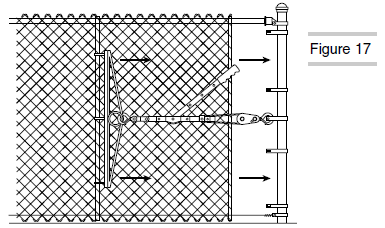
Step 7: Stretching Fence Fabric
Temporarily insert a tension bar about 3' inside the unattached end of the fabric. Securely fasten one end of the fence stretcher to the tension bar and the other end to the terminal post, then stretch the fabric. The correct fabric tension should allow a slight amount of give when squeezed by hand. Once you have the proper tension, remove the temporary tension bar. Next, adjust the fabric to the exact length by adding or removing wire. Insert a tension bar at the end of the fabric and connect it to tension bands on the terminal post.
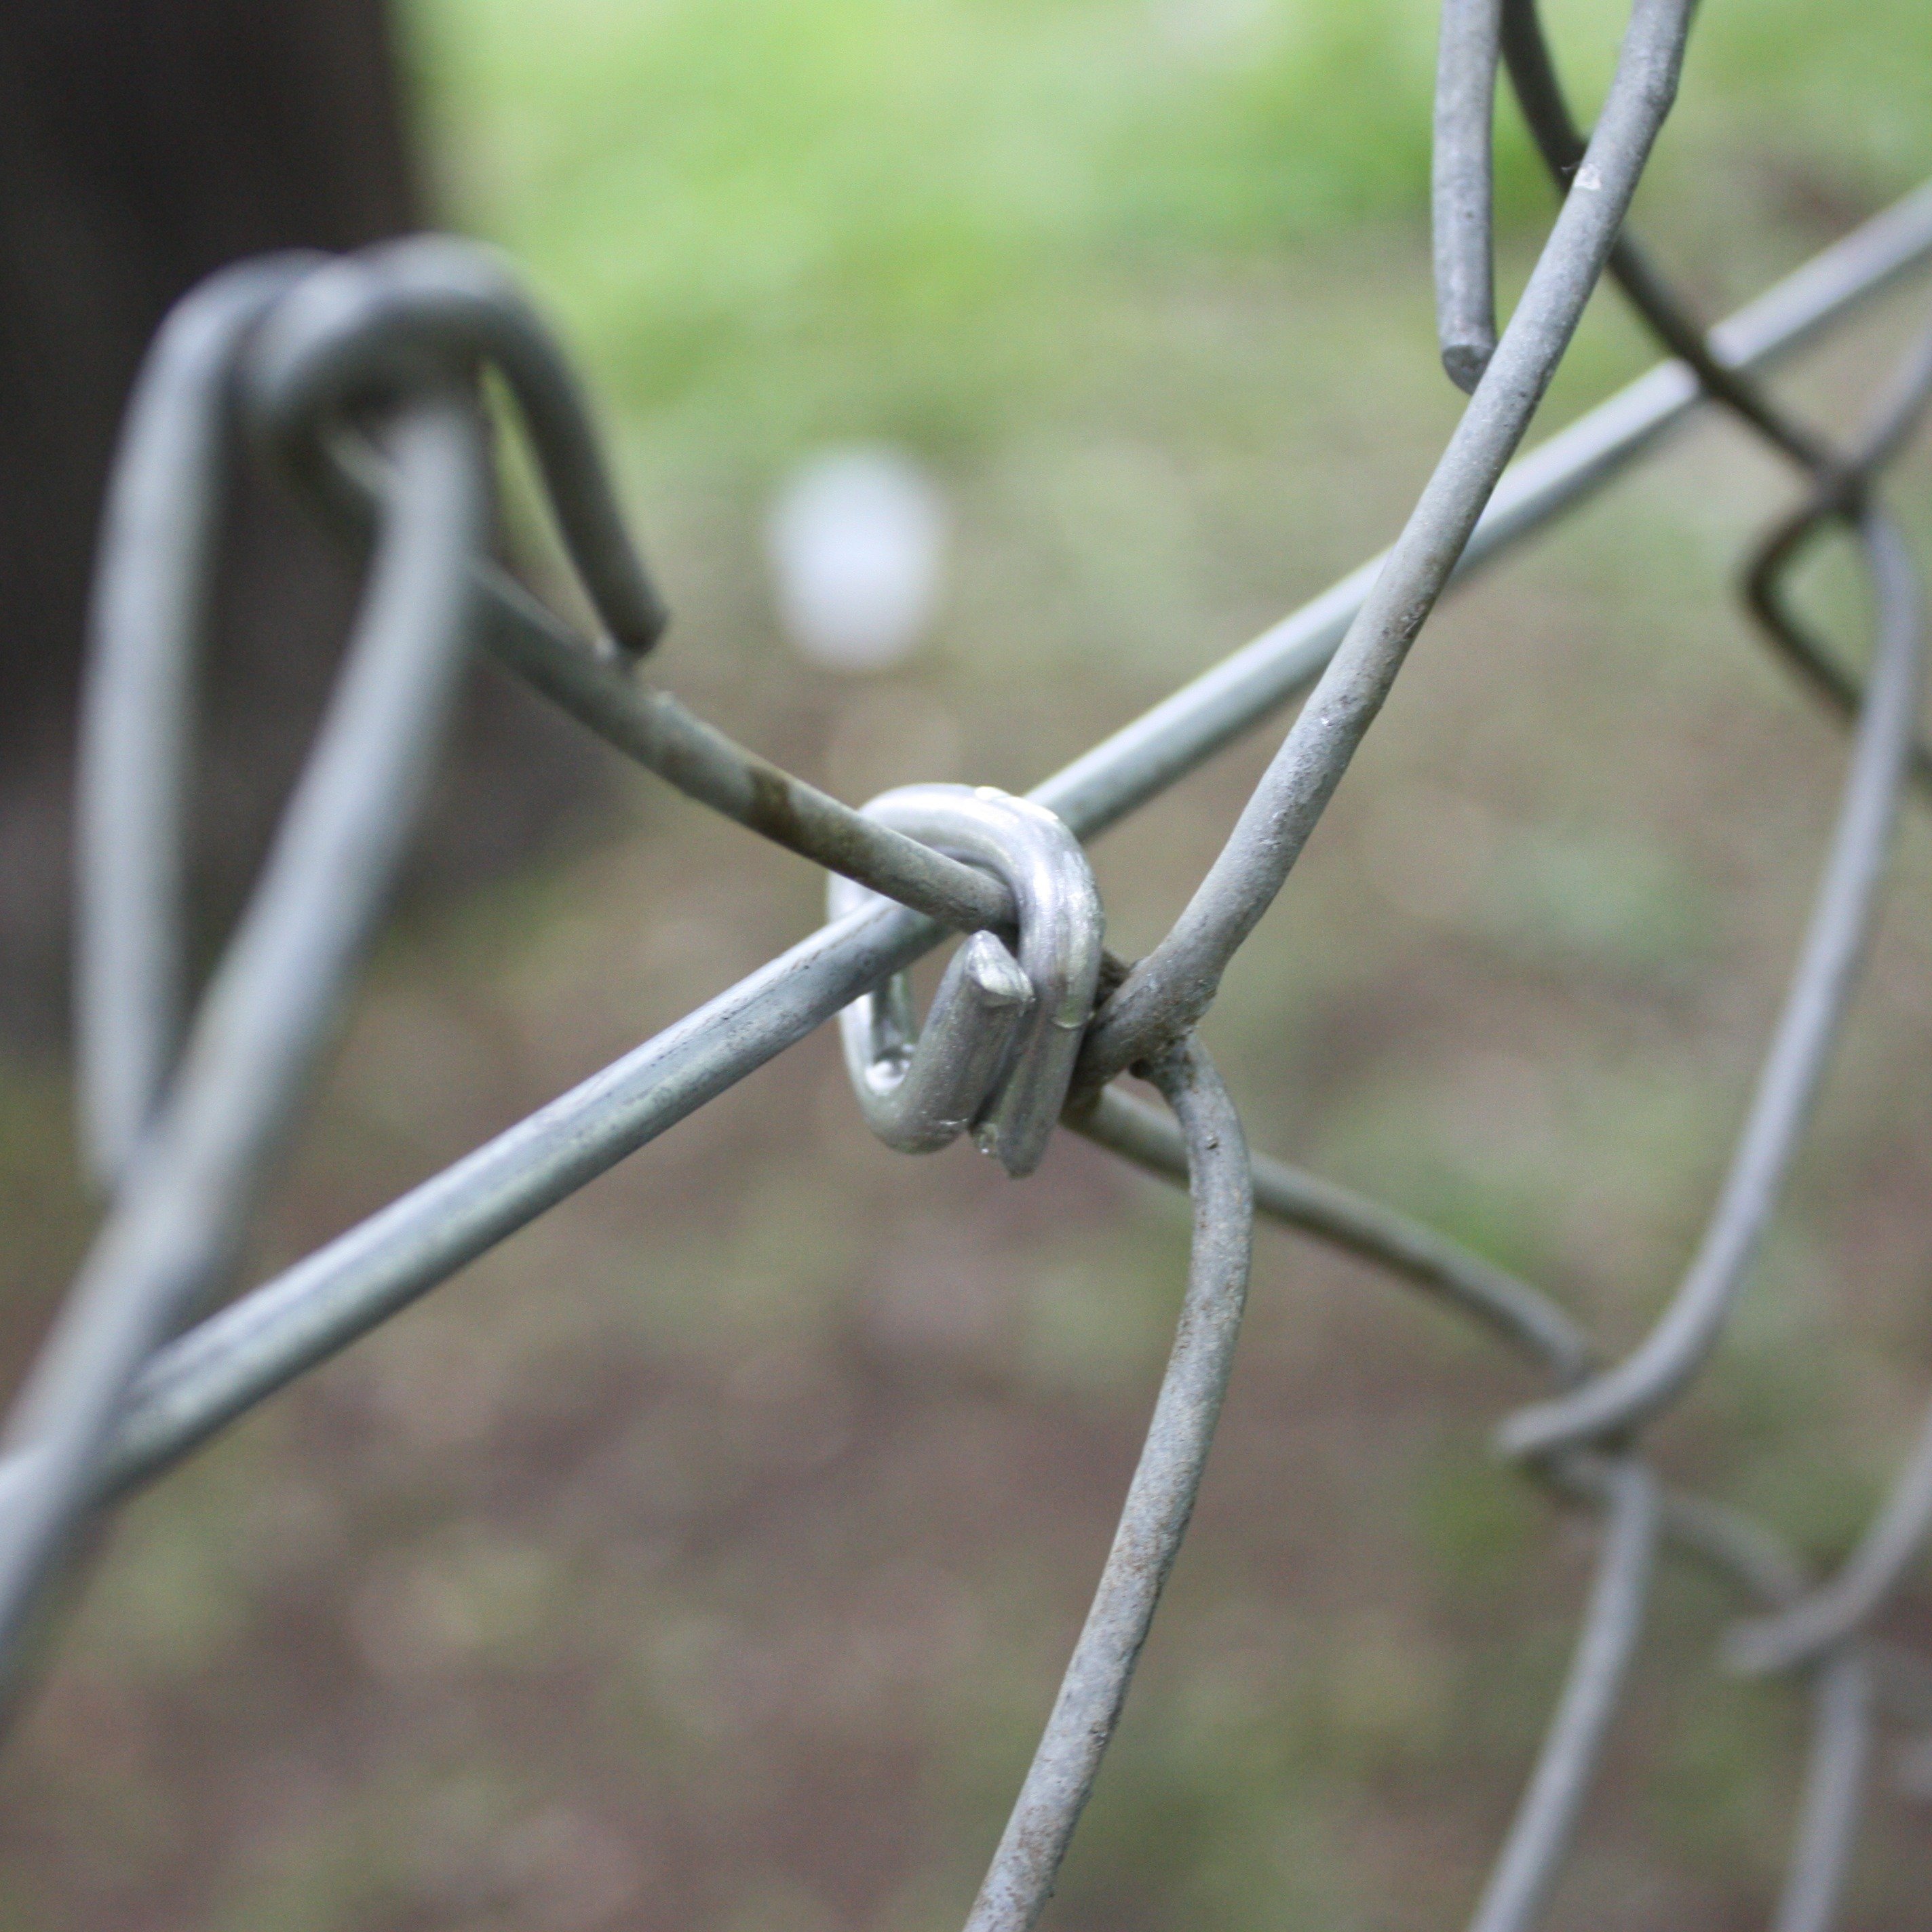
Step 8: Installing Fence Ties
Fasten the fabric securely with fence ties spaced approximately 24" apart along the top rail and 12" apart on each line post. Finally, securely tighten the nuts on all rail end bands and tension bands.
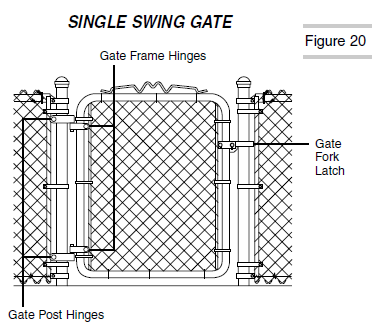
Step 9: Hanging The Gate
Apply gate post hinges to gate post approximately 8" from the top and bottom of the gate post with the top hinge pinpointing down and the bottom hinge pin pointing up. This will prevent the gate from being removed or from dropping off. Tighten all bolts securely, then apply the gate frame hinges to the gate frame and loosely fasten bolts so they can be easily adjusted on the gate frame. Hang the gate in place so there is approximately 2" of ground clearance at the bottom. Once that's done, tighten the bolts on the bottom frame hinge first, then adjust and tighten the bolts securely at the top. Lastly, position the gate fork latch at a convenient height and tighten all bolts securely. Please note that a similar installation procedure is used on both single-swing and double-swing gates.

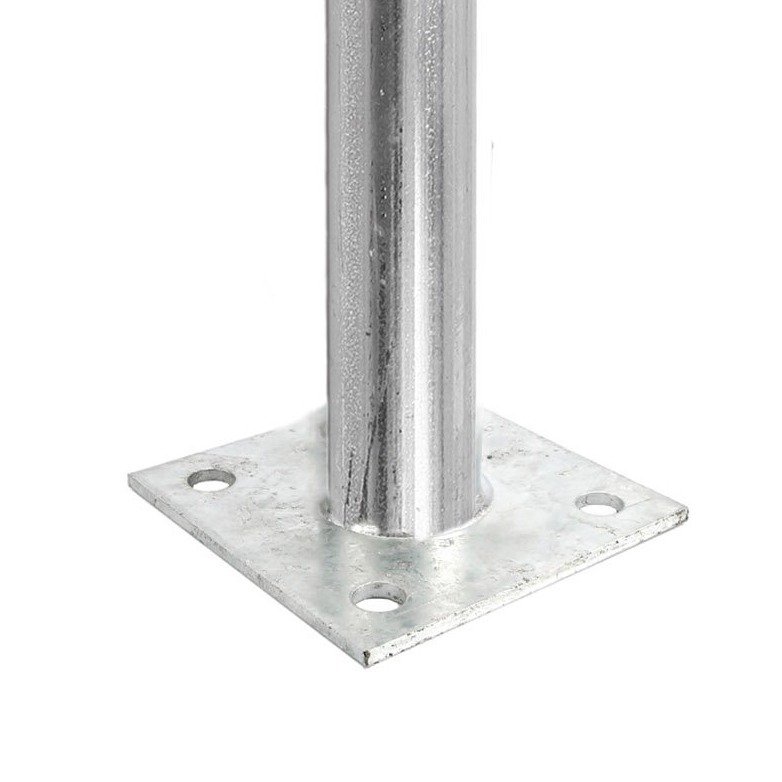
Terminal Post And Line Post Installation
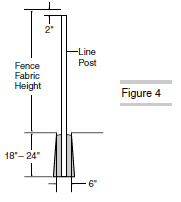
Using a post hole digger, dig terminal post holes approximately 8" in diameter and 30" deep, with sloping sides. Using a crayon or chalk, mark the ground line on posts. The above-ground height of terminal posts will equal the height of the chain link fabric plus 2". Center the terminal posts in the holes, making sure the posts are plum and set at the correct height. The crayon or chalk mark should be at ground level. Once the post is set, surround it with concrete in a continuous pour, then trowel finish around the posts, creating a downward slope to direct water away from the post.
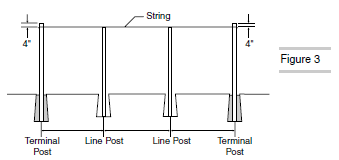
When the terminal post footings have hardened enough to stabilize the posts, stretch a string line taut between terminal posts. The string should be positioned on the outside face of the posts 4" below the top. The height, above level ground, of line posts will equal the height of the fabric minus 2". Measure the distance between terminal posts and refer to Post Spacing Chart to determine the distance between line posts. Dig line post holes 6" wide and 18" to 24" deep, with sloping sides. Center the line posts in the holes. Make sure the posts are plumb, aligned with the centers of terminal posts and set at the correct height. Surround posts with concrete in a continuous pour and trowel finish around posts, sloping downward to direct water away.
Post Spacing Guide
| Distance Between Terminal Posts | Distance Between Line Posts | Distance Between Terminal Posts | Distance Between Line Posts | Distance Between Terminal Posts | Distance Between Line Posts |
|---|---|---|---|---|---|
| 30 ft. | 10 ft. | 51 ft. | 8 ft. 6 in. | 72 ft. | 9 ft. |
| 31 ft. | 7 ft. 9 in. | 52 ft. | 8 ft. 8 in. | 73 ft. | 9 ft 2 in. |
| 32 ft. | 8 ft. | 53 ft. | 8 ft. 10 in. | 74 ft. | 9 ft 3 in. |
| 33 ft. | 8 ft 3 in. | 54 ft. | 9 ft. | 75 ft. | 9 ft. 4 in. |
| 34 ft. | 8 ft. 6 in. | 55 ft. | 8 ft. 2 in. | 76 ft. | 9 ft. 6 in. |
| 35 ft. | 8 ft. 9 in. | 56 ft. | 9 ft 4 in. | 77 ft. | 9 ft. 7 in. |
| 36 ft. | 9 ft. | 57 ft. | 9 ft. 6 in. | 78 ft. | 9 ft. 9 in. |
| 37 ft. | 9 ft. 3 in. | 58 ft. | 9 ft. 8 in. | 79 ft. | 9 ft. 10 in. |
| 38 ft. | 9 ft. 6 in. | 59 ft. | 9 ft. 10 in. | 80 ft. | 10 ft. |
| 39 ft. | 9 ft. 9 in. | 60 ft. | 10 ft. | 81 ft. | 9 ft. |
| 40 ft. | 10 ft. | 61 ft. | 8 ft. 8 in. | 82 ft. | 9 ft. 1 in. |
| 41 ft. | 8 ft. 2 in. | 62 ft. | 8 ft. 10 in. | 83 ft. | 9 ft. 3 in. |
| 42 ft. | 8 ft. 5 in. | 63 ft. | 9 ft. | 84 ft. | 9 ft. 4 in. |
| 43 ft. | 8 ft. 6 in. | 64 ft. | 9 ft. | 85 ft. | 9 ft. 6 in. |
| 44 ft. | 8 ft. 9 in. | 65 ft. | 9 ft. 3 in. | 86 ft. | 9 ft. 7 in. |
| 45 ft. | 9 ft. | 66 ft. | 9 ft. 5 in. | 87 ft. | 9 ft. 8 in. |
| 46 ft. | 9 ft. 2 in. | 67 ft. | 9 ft. 7 in. | 88 ft. | 9 ft. 9 in. |
| 47 ft. | 9 ft. 5 in. | 68 ft. | 9 ft. 8 in. | 89 ft. | 9 ft. 10 in. |
| 48 ft. | 9 ft. 7 in. | 69 ft. | 9 ft. 10 in. | 90 ft. | 9 ft. |
| 49 ft. | 9 ft. 9 in. | 70 ft. | 10 ft. | 91 ft. | 9 ft. 2 in. |
| 50 ft. | 10 ft. | 71 ft. | 8 ft. 9 in. | 92 ft. | 9 ft. 2 in. |