Chain Link Fence Gate Panic Push Bar
If you are searching for an easy exit solution for your chain link gate, a panic bar can cross your gate and help you control who enters a building and who can exit. After all, since panic bars can only open to the outside, it will help you control access points for your facility. Plus, since a force of only about 15 pounds is required for gates to open when someone is attempting to exit as fast as possible due to a fire or another emergency, they can leave without messing around with a handle or lock. Panic bars are also usually required in schools, assembly, or high-hazard work areas. But if you need to install one on a chain link gate, it's easy to start.
How Do You Install A Panic Bar On A Chain Link Fence?
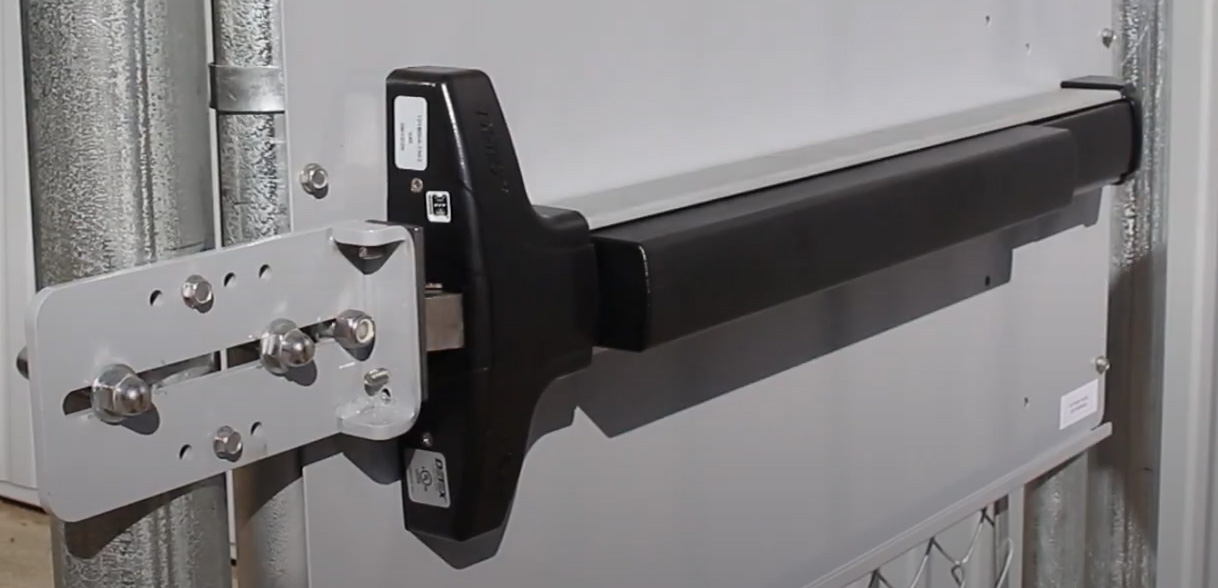
The first thing you'll need to install a panic bar to your chain link gate is an extension or mounting plate. It is made to place your panic bar evenly across the chain link of your fence. After this, you'll require a lock box if you would like to lock your gate. In most cases, everything you need to install a panic bar to a Chain Link gate is included in panic bar kits. For example, if you choose a Detex Advantex Bar Premium kit, you will receive a stainless-steel panic bar, a lock box, a receiver bracket, a key cylinder, and a black mounting plate.
After you have everything you need, the first step is to:
- Measure the width of your gate.
- Place the key cylinder on the mounting plate.
- Take time to trim the spindle on the key cylinder.
- Install the panic bar with the correct screws, and then install the head cover.
- Make the mounting plate match the measurements taken in step one.
- If there is an end cover, take this apart and mark where it will go, but do not install it yet.
- Use a ¼" drill bit or whatever drill bit is recommended to install your end covers.
- Make an indication of where you will mount your panic bar.
- Ensure you mount your panic bar at the regulations given in your district (remember that 40" to 42" is standard).
- Align your panic shield, cut your chain link if required, and secure your panic shield with shelf-drilling screws.
- Install the receiver bracket to match up with your mounting plate.
- Test to see if everything works properly, and you are done!
In step eleven, some installers choose to weld the receiver bracket when installing to stop others from tampering with it and getting access to the gate. You can weld it yourself or contract a professional if you want this.
What Are The Regulations That Go With Panic Bars?
If you want to learn all the regulations that go with panic bars, the article "Are Panic Bars Required On Exit Doors" will help clear up all the requirements, including how hardware should always be ADA-compliant and what testing is needed.