Attaching Round Posts To Concrete
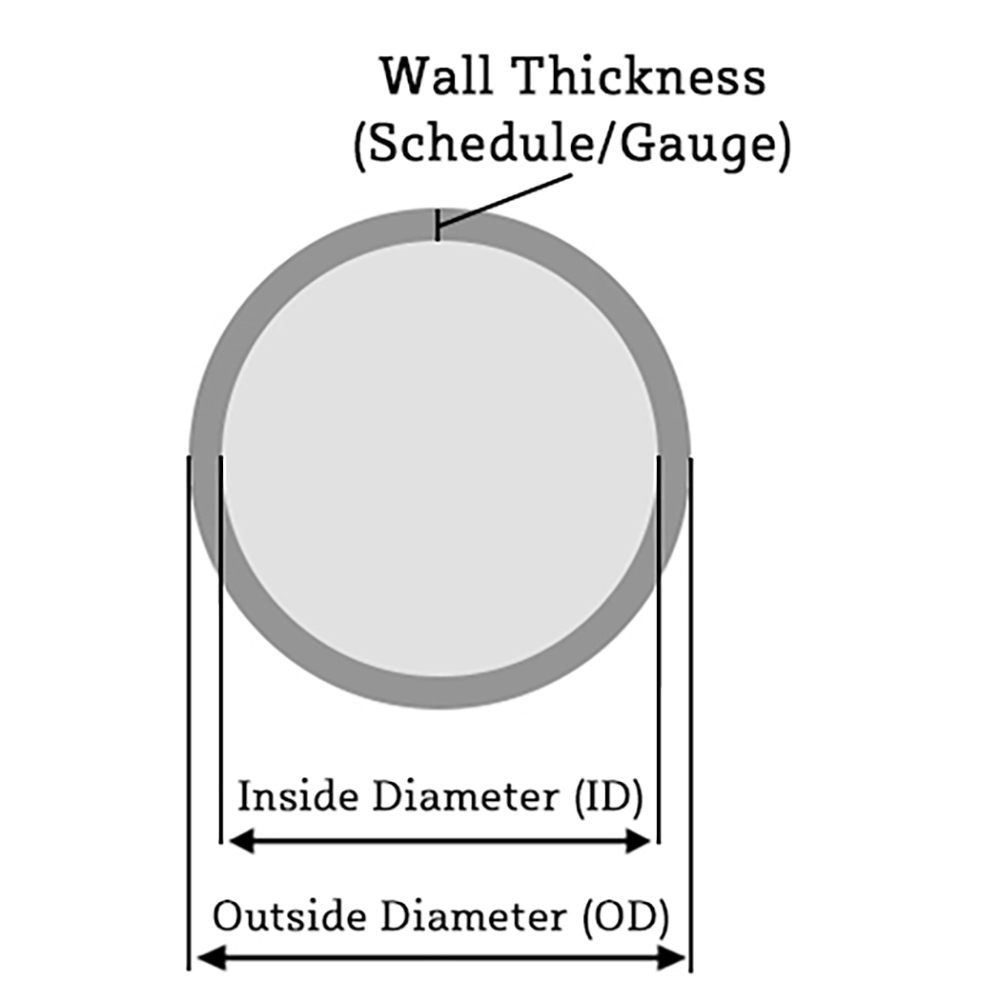
Attaching round fence posts to concrete may seem difficult, but it's easier than most people think. All it requires is the right set of tools. First, you need to pick what type of floor flange you need. There are two main types: Bolt On and Weld On. The biggest difference between the two are strength. The weldable one will be significantly stronger than the bolt-on. A weldable floor flange for a fence post may be a good choice when high strength is needed. Some examples would be livestock fences or gate posts. Most of the time, bolt-on flanges are perfectly suitable for the post. One nice thing about the bolt-on flange is that a set screw is the only thing needing tightening when attaching the post to the floor flange, whereas the weld-on will require a welding machine and the knowledge of how to weld. When you buy the floor flanges, please be sure to measure the outside diameter of the pipe (post) that will be used.
Once the right floor flanges are purchased, the next step is ensuring the right bolts are used. Most people use either Screw Anchor Bolts or Wedge Anchor Bolts. Both of these have their advantages depending on what type of environment they're used in. The screw anchor bolts are better to use when aesthetics are a key factor. They provide a flush finish since they are screwed completely down. Another reason a screw bolt would be used is when the object will be lightly used. It's not advised to use these for heavy objects or anything that will be subject to high dynamic forces. Screw anchor bolts can be removed if need be, whereas wedge anchor bolts will have to either be driven down further or use a grinding wheel to cut the protruding end off. Wedge anchors provide greater strength, however, can only be used in solid concrete and cannot be removed without damaging the concrete.
After figuring out which flange and anchor bolt will be needed, it's time to start the installation. Certain tools will be needed.
- Hammer
- Masonry Drill Bit* (Make sure these are the same diameter as the anchor bolt)
- Hammer Drill
- PPE (Hearing protection, eye protection, dust mask)
- Vacuum or something to blow or clean out the hole
- Impact Wrench with correct sized sockets
Screw Anchor Installation
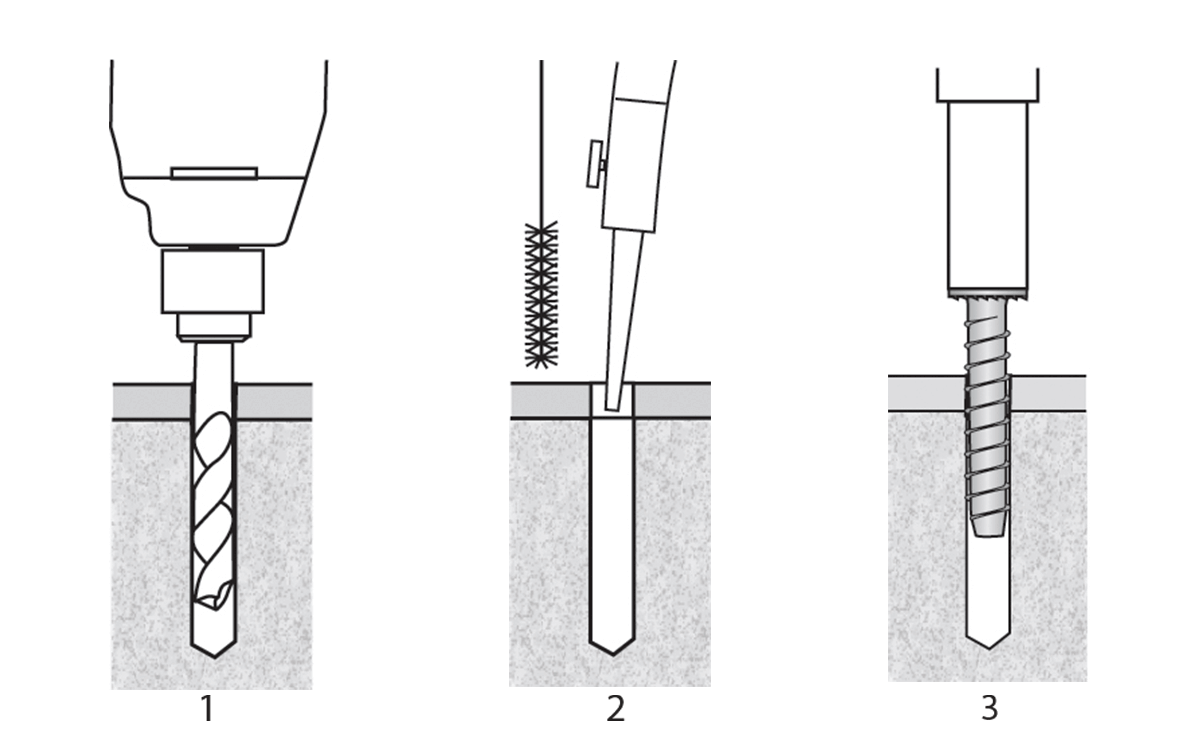
Screw Anchor Bolt Example
-
Step One
Using the hammer drill and masonry bit, drill perpendicular to the surface and deeper than the intended embedment, usually about 1/2" deeper. -
Step Two
Use a vacuum or pressurized air to clean out the hole. This will allow a clean, secure fit. -
Step Three
Align the flange with the drilled hole and screw the bolt down using the impact wrench. -
Step Four
Attach the pipe to the floor flange, depending on the style. This means either welding the pipe or tightening the set screw.
Wedge Anchor Installation
-
Step One
Using the hammer drill and masonry bit, drill perpendicular to the surface and deeper than the intended embedment, usually about 1/2" deeper. -
Step Two
Use a vacuum or pressurized air to clean out the hole. This will allow a clean, secure fit. -
Step Three
Twist the nut so that it is flush with the end. Grab the floor flange, line it up with the hole then take the hammer and drive the wedge anchor bolt into the hole until the washer and nut are against the base material. -
Step Four
Screw the bolt down using the impact wrench. -
Step Five
Attach the pipe to the floor flange, depending on the style. This means either welding the pipe or tightening the set screw.
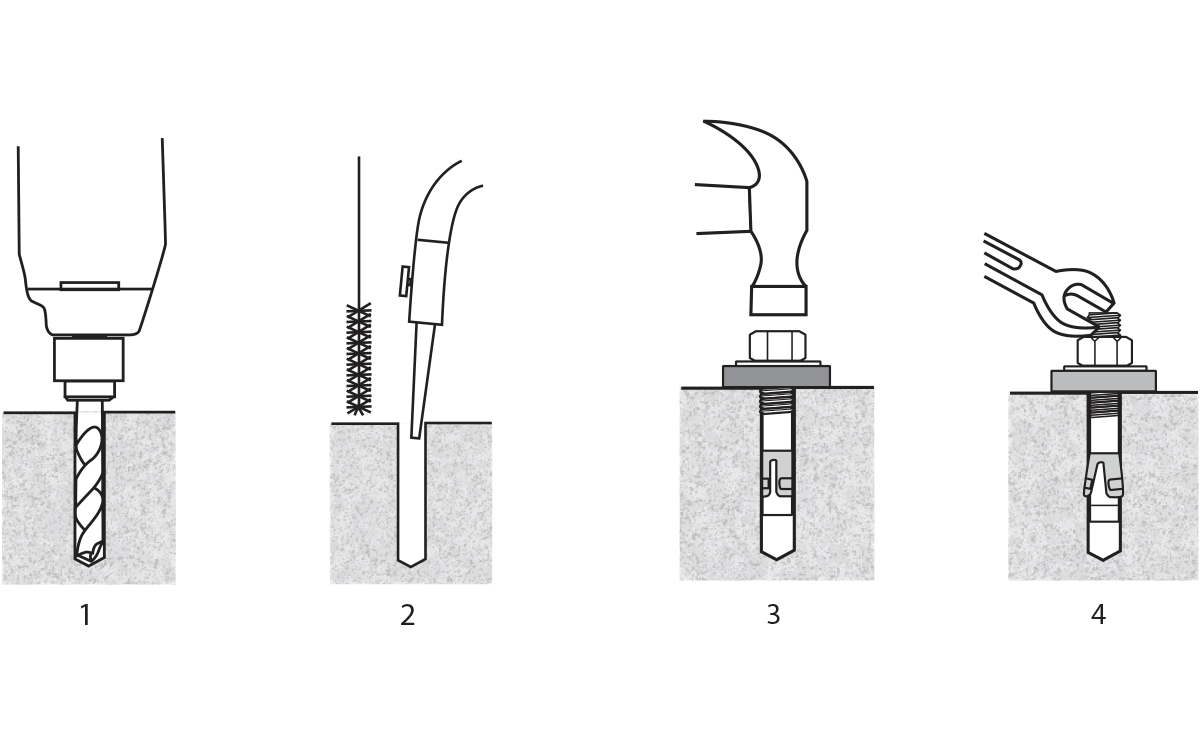
Wedge Anchor Bolt Example
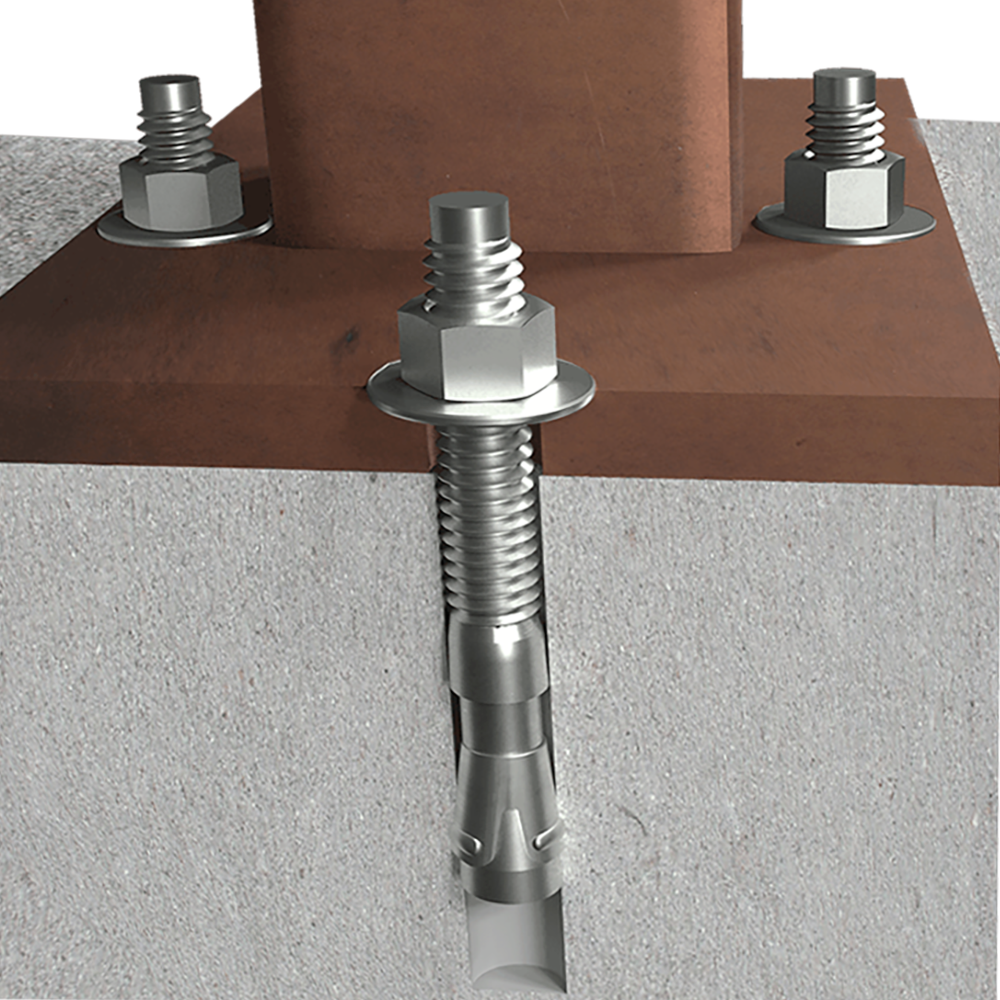
Wedge Bolt Example
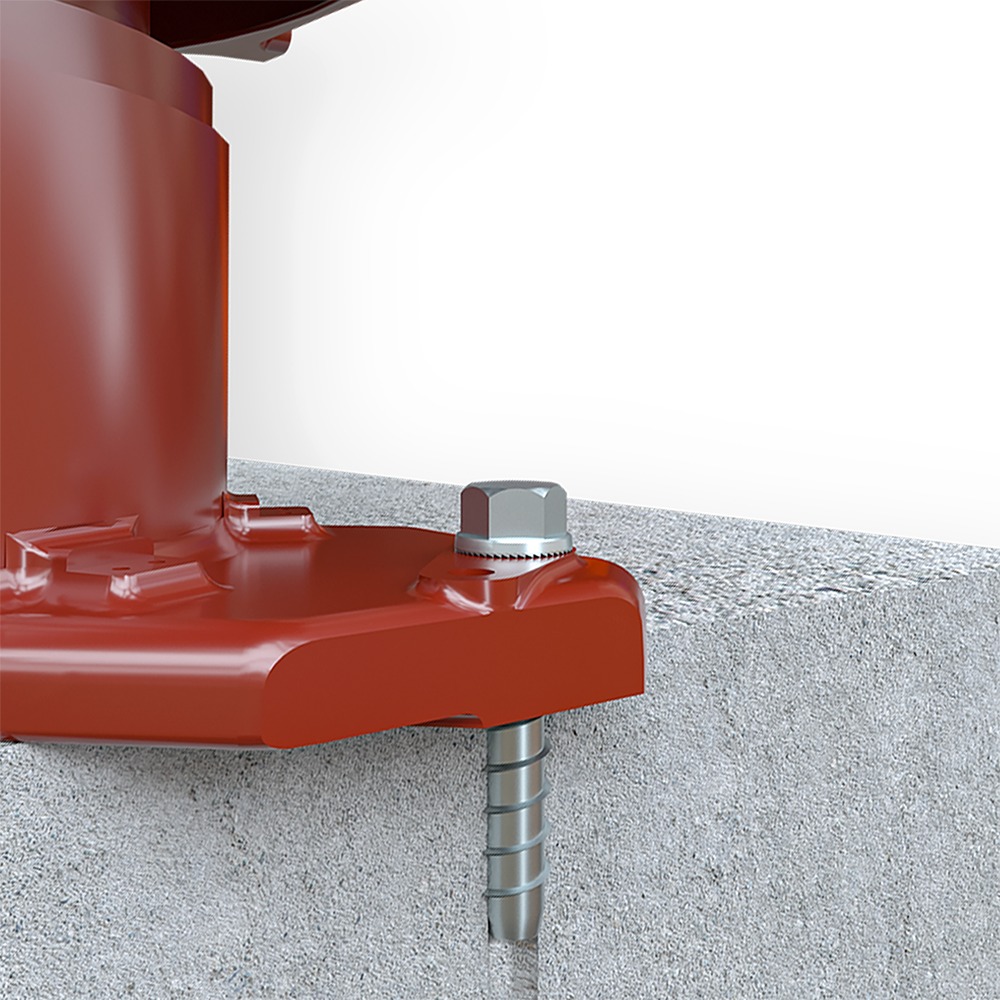
Screw Bolt Example
Installing a post to concrete is harder said than done. All it takes are the proper tools and materials. If you need help measuring or just want more information about the aluminum pipe, check out our How To Measure Your Fence Post article. Feel free to call us or shoot us an email if you have any questions. At Chain Link Fittings, we are happy to help in any way!

