DIY Chain Link Fence Mesh Installation

Installing chain link fence mesh is one of the final and most rewarding steps in setting up your fence. Once the posts, rails, and framework are securely in place, attaching the mesh is a straightforward process that transforms your setup into a fully functional, durable fence. While it may seem intimidating at first, with the right tools, proper techniques, and a bit of patience, you can achieve a tight, professional-looking mesh installation without hiring a contractor.
This guide will walk you through everything you need to know, from selecting the best tools for stretching and securing chain link mesh to mastering the step-by-step installation process. Whether you're installing fencing for security, pet containment, or property boundaries, the process remains the same and is entirely doable as a DIY project.
Before we dive into the mesh installation process, it's important to note that this guide assumes your fence posts and rails are already set up. If you haven't reached this stage yet, be sure to check out Installing A Chain Link Fence for a full breakdown of setting your posts, attaching rails, and ensuring a solid fence foundation. Once your frame is complete, you can return here to tackle the final step—securing and tensioning your chain link mesh for a sturdy, long-lasting fence.
Essential Fittings & Tools for Chain Link Mesh Installation
Chain Link Mesh Installation Fittings
Mesh: The chain link mesh, also called chain link fabric, is the primary fencing material. It is stretched between terminal posts and secured with tension bands, bars, and ties to create a strong, durable barrier.
Tension Band & Carriage Bolts: Tension bands are used to secure the chain link mesh to terminal posts (corner, end, or gate posts). They wrap around the post and hold the tension bar in place, ensuring the mesh stays taut. Carriage bolts fasten the tension band securely to the post.
Brace Band & Carriage Bolts: Brace bands are used to attach horizontal rails, bottom tension wires, or other structural supports to terminal posts. Like tension bands, they wrap around the post and are fastened with carriage bolts to hold the framework firmly in place.
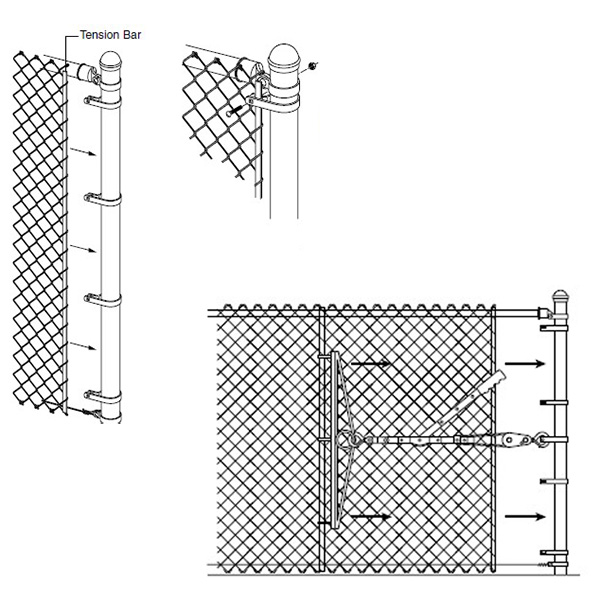
Tension Bar: The tension bar is a flat, narrow piece of metal that is woven through the end of the chain link fabric. It distributes tension evenly and is secured to terminal posts using tension bands, keeping the fence fabric upright and taut.
Fence Ties: Fence ties are used to attach the chain link mesh to line posts and rails. They wrap around the post or rail and loop through the mesh, ensuring it remains stable and properly aligned along the length of the fence.
Tension Wire & Hog Rings *Optional: Tension wire is installed along the bottom (and sometimes the top) of the chain link mesh to reinforce the fence and prevent animals or intruders from lifting it. Hog rings are small metal fasteners used to attach the mesh to the tension wire, keeping it securely in place.


Chain Link Mesh Installation Tools
Stretchers: Chain link fence stretchers are essential for achieving proper tension in the chain link mesh. Tools like the Bear Hold Chain Link Fence Stretcher allow installers to pull the fence fabric tightly and hold it in place while securing tension bands and tension bars. A fence stretcher tool prevents sagging and ensures a durable, professional fence installation.
Pliers: Fence pliers are a multi-use tool for bending, tying, and securing fence ties to posts and rails. Hog Ring Pliers are specialized for clamping hog rings to attach chain link fabric to tension wire, providing additional stability to the fence structure.
Wire Gripper (if using tension wire): A wire gripper tool is used for securely gripping and stretching tension wire during chain link fence installation. This tool ensures proper wire placement along the bottom and top of the fence, preventing the fabric from being lifted or bent.
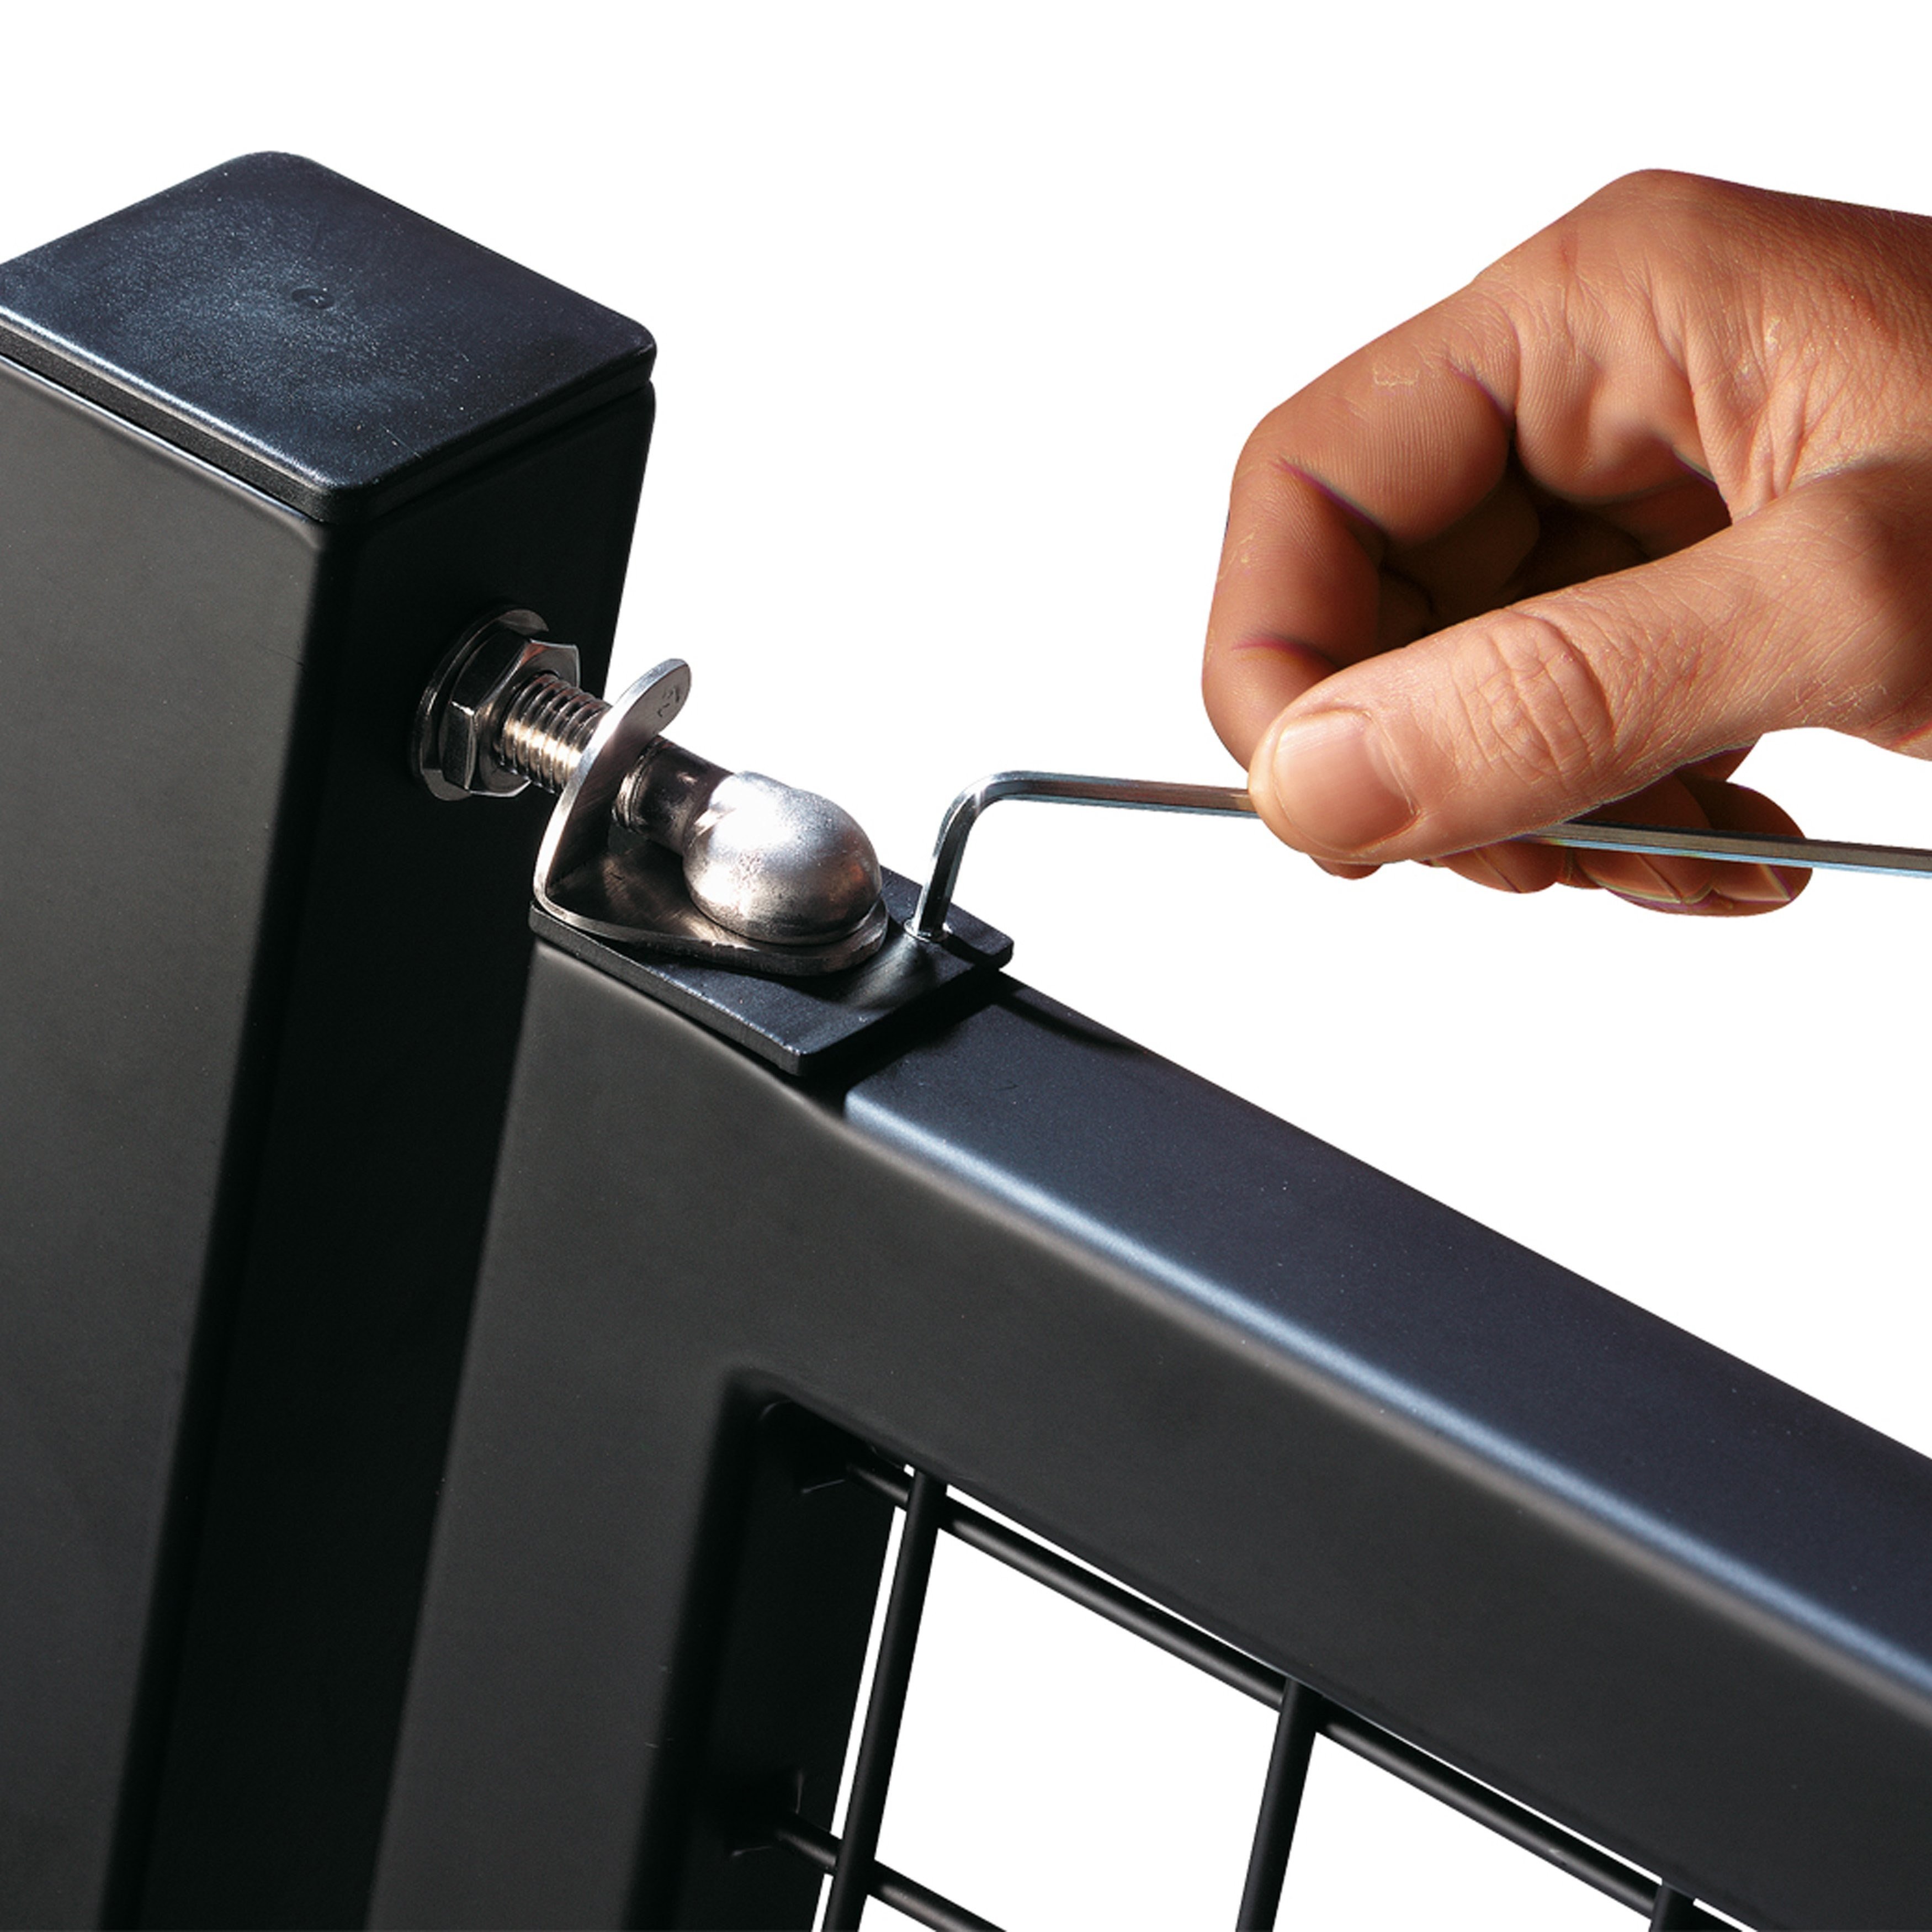
Wrench(es): Adjustable wrenches or socket wrenches are used to tighten carriage bolts on tension bands, brace bands, and post hardware. Proper tightening is crucial for maintaining the structural integrity of the chain link fence system, ensuring a secure and long-lasting installation.
Knuckling Tool *Optional: A knuckling tool for chain link fences helps bend and twist wire ends, ensuring smooth knuckles that prevent injuries and improve the finished appearance of the fence. This tool is especially useful for knuckling and twisting barbed wire or reinforcing fence edges.


Shop All Tools
Step-by-Step Guide to Installing Chain Link Fence Mesh
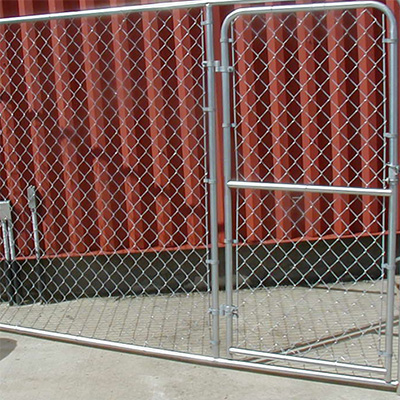
Installing chain link fencing properly is essential for creating a durable, secure, and professional-looking fence. Ensuring the chain link mesh is evenly stretched and properly secured to the fence posts will help maintain its structural integrity and prevent sagging over time. This guide walks you through each step of the chain link fence installation process, from unrolling the fence fabric to attaching it securely to the terminal posts. Following these steps will help you achieve a strong, well-aligned chain link fence that will stand the test of time.
Step 1: Unrolling & Preparing the Chain Link Mesh
- Lay the chain link mesh roll on the ground next to the fence line, ensuring it aligns with the terminal posts.
- Unroll a manageable section, typically 10-15 feet at a time, to prevent tangling and allow for easy handling.
- Attach one end of the fence fabric to a tension bar by weaving the bar through the first row of mesh links.
- Secure the tension bar temporarily to the terminal post using fence ties or clamps before applying fence tensioning.
Step 2: Attaching the Mesh to the First Fence Post
- Insert a tension bar through the first vertical row of chain link fabric, ensuring it passes through every link evenly.
- Position the tension bar against the terminal post and secure it using tension bands spaced evenly along the post.
- Insert carriage bolts through the tension bands and tighten them using a wrench to hold the chain link mesh securely.
- Confirm that the fence fabric is straight and properly aligned before moving on to stretching.
Step 3: Stretching the Chain Link Mesh
- Hook a mesh stretcher or fence stretcher tool to the opposite post to begin applying tension.
- Attach a stretcher bar to the chain link fabric and pull until the fence mesh is taut but not overstretched.
- Use a level to check that the mesh is aligned properly along the fence posts before securing.
Step 4: Securing the Mesh to Line Posts
- Once the chain link fencing is stretched properly, attach it to each line post using fence ties or hog rings.
- Secure the fence ties approximately 12-18 inches apart to maintain stability and prevent sagging.
- Repeat for every line and corner post until you reach the final terminal post.
Step 5: Securing the Chain Link Mesh to the Final Terminal Post
- Pull the chain link fabric tightly toward the final terminal post, ensuring even tension.
- Insert a tension bar through the last vertical row of chain link fencing, securing all the links evenly.
- Attach the tension bar to the terminal post using tension bands and fasten it with carriage bolts.
- Tighten the carriage bolts with a wrench, ensuring the fence fabric is secure and properly tensioned.
- Confirm that the fence mesh is straight and free from gaps or misalignment.
- If there is excess chain link mesh, remove it by unweaving a single thread from the fence fabric rather than cutting it.
Step 6: Final Adjustments & Checking Fence Tension
- Inspect the entire chain link fence to ensure the fence mesh is straight, properly tensioned, and free from sagging.
- Tighten any loose fence ties, tension bands, or carriage bolts for added security.
- If a tension wire is being used, make sure it is properly stretched along the bottom and secured with hog rings.
- Verify that both the top and bottom edges of the fence fabric maintain uniform tension across the entire fence line.
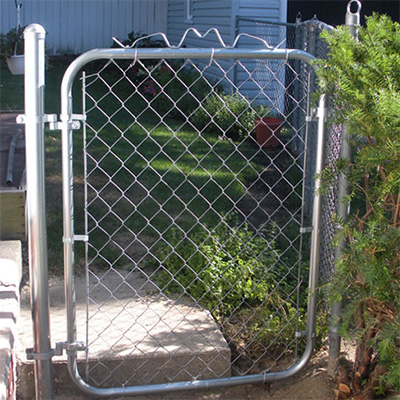
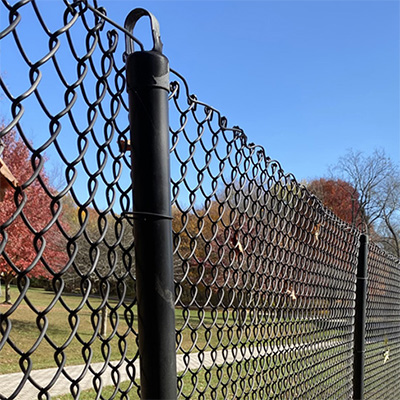
Chain Link Mesh Installation Gallery

Where to Ordering Chain Link Fence Mesh
When looking for high-quality chain link fence mesh, exploring your options is key. Part of the DF Supply Inc. Family, AluminumChainLink and DomesticFenceFittings offer a variety of chain link fencing materials, including aluminum chain link fabric for corrosion resistance and galvanized chain link mesh for durability. However, regardless of where you browse, you will need to contact us directly to place your order. Our team is ready to assist you in selecting the best fence mesh for your needs, ensuring you get the right size, finish, and specifications for your project.
How to Order Chain Link Fence Mesh
There are many options when it comes to chain link fence mesh, allowing you to customize it to fit your specific needs. Factors like mesh size, height, length, coating, wire gauge, and selvage type all play a role in determining the durability, security, and appearance of your fence. To ensure you get exactly what you need, we recommend preparing some key details before placing your order.
When calling to order, please have the following information ready:
- Height & Length: Specify how tall you need your chain link fence to be and the total length required.
- Mesh Size: Choose from standard or custom diamond mesh sizes to match your fencing application.
- Coating Type: Decide between galvanized or powder-coated finishes for added protection.
- Wire Gauge: Select the wire thickness based on the strength and security needed for your fence.
- Selvage Type: Choose between knuckled selvage for safety or barbed selvage for enhanced security.
If you have any questions about your options or need guidance on the best choice for your application, please don't hesitate to contact us. We're here to help and happy to assist in preparing your chain link mesh order to ensure you get exactly what you need.
Contact Us